–

This project is used for create a Wireless Doorbell based on SPIRIT1 & NUCLEO boards.
The SW is a derivation of this with some change for do a wireless door bell.
The Wireless Doorbell is based on this boards:
X-NUCLEO-IDS01A4 (868 MHz)
NUCLEO-L053R8
of course are necessary two kits.
Thanks to mBED is very easy transfer the SW on other Boards or MCU.
There is two SW, one for TX kit (external doorbell) and another one for RX kit (internal ringer)
TX sw is here
RX sw is here
The binary file ready to download on the TX and RX kit are here.
–
SW NOTE:
In the SW, at the beginning of program, there is this variable:
static char send_buf[TEST_STR_LEN] ={‘S’,’P’,’I’,’R’,’I’,’T’,’1′,’ ‘,’H’,’E’,’L’,’L’,’O’,’ ‘,’W’,’O’,’R’,’L’,’D’,’ ‘,’P’,’2′,’P’,’ ‘,’D’,’E’,’M’,’O’};
The send_buf is your password used for the communication from the external doorbell to the internal ringer.
Change it to avoid interference between two Doorbells made with the same KIT and SW.
If you need to change the sound of the ring tone the routine to change start at line 178 until line 204.
 // Read the red LED status
 if(TestLED == 1)
 {
    int n=0;
    for(n=0; n<=6; n++)
    {
       wait_ms(500);
       TestLED = 0;
       wait_ms(150);
       TestLED = 1;
    }
    for(n=0; n<=12; n++)
    {
       wait_ms(250);
       TestLED = 0;
       wait_ms(100);
     TestLED = 1;
    }
    for(n=0; n<=18; n++)
    {
    wait_ms(150);
    TestLED = 0;
    wait_ms(70);
    TestLED = 1;
    }
 TestLED = 0;
 }
If you connect the KIT to the PC and use a terminal emulation, we suggest TeraTerm, you see the extra information.
The terminal emulation configuration must be: 9600 8 N 1 N
–
HW NOTE:
For this project we have used the X-NUCLEO-IDS01A4 that cover some tens of meters (it use a small integrated antenna).
If you need cover 50…100 meters, we suggest to use the SPSGRFC – available at 433, 868 or 915 MHz MHz – (UFL connector for external antenna + SPIRIT1).
The SW don’t change, change the distance that you cover that increase a lot.
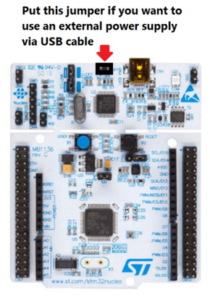
Power Supply NOTE:
How to use this doorbell
- First, on the RX kit, connect a Alarm Buzzer to:
GND and
Pin n.6 on connector CN9 present on the X-NUCLEO-IDS01A4
See the image below.

- Second, on the TX kit, connect a push button at the pins listed below:
GND and
PC13 (connector CN7 on the NUCLEO board)
See the image below.
–
- The global connections are shown below
–
 –
–
Some HW modification
If you have already a DoorBell installed in your home and you need install a new internal ringer you must use this project.
It is necessary only substitute the Push Button, with a relay connected in parallel to your current internal ringtone.
Of course choose a relay with appropriate work voltage compatible to your internal ringtone.
See the schematics below.

My installation
———————————-TX


–
————RX
